how to use gel nail polish?
I. Introduction
Gel nail polish has quickly become one of the top choices for those in search of long-wearing and chip-proof manicures, thanks to its ability to deliver salon-grade results that last several weeks without chips or wear and tear. In this comprehensive guide we'll walk you through every step of using it yourself so you can achieve professional-looking results right from home!
II. Prepalitat
A. Clean and Shape the Nails
Begin your gel manicure preparations by first using an acetone-based nail polish remover to clean away any old polish from your nails, providing a blank canvas upon which to create it. Next, shape them according to your liking using a nail file; whether that be classic squares, rounded corners, or trendy stiletto nails this step allows you to tailor it specifically for yourself!
B. Push Back Cuticles and Remove Excess Oils Gently push back your cuticles using a cuticle pusher or orangewood stick, taking care not to cut your cuticles as they act as protective barriers for your nails. For optimal adhesion of gel polish applications, remove any excess oils by wiping each nail surface with a lint-free wipe dampened in rubbing alcohol or using nail dehydrator solutions such as nail dehydrator wipes soaked in dehydrating solutions or wipes saturated in nail dehydrator solutions.
C. Lightly Buff the Nail Surface for Better Adhesion Use a fine-grit buffer to lightly buff each nail's surface for improved adhesion, creating a slightly rough texture on each plate to help gel polish adhere more securely and avoid premature chipping or peeling. Be wary not to overbuff as excessive buffing could weaken nail plates; once finished use either a clean brush or lint-free wipe to remove dust or debris left by this step.

III. Application
A. Apply a Thin Layer of Base Coat and Cure Under UV/LED Lamp When it comes to application, start with applying an even and thin coat of gel base coat over each nail, making sure to cover every surface area. This serves as the basis of gel polish, adhering securely to its surface while helping avoid lifting. Once this step has been completed, cure under a UV or LED lamp according to manufacturer instructions for best results.
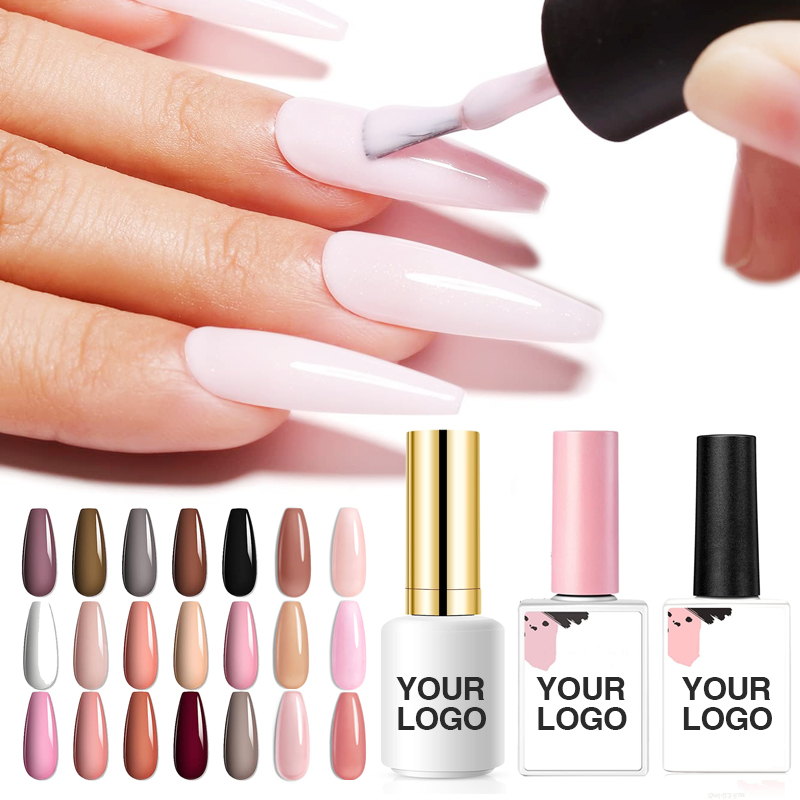
B. Apply the First Coat of Gel Polish Evenly By Selecting your preferred gel polish color and applying a thin coat starting at the base and brushing toward the tip, apply a single thin coat evenly and smoothly on each nail for seamless results. Pay special attention to any visible streaks while spreading color evenly. Attempt not to get polish on cuticles or skin. Cure under UV/LED lamps when directed for best results.
C. Cure the First Coat Under UV/LED Lamp To ensure proper curing, place your nails under an UV or LED lamp for the recommended timeframe as specified by your specific brand of gel polish manufacturer. Curing helps harden and bond gel polish to nails for long-lasting manicures.
D. To Achieve Full Opacity and Cure Again For maximum color vibrancy and opacity, apply another coat of gel polish using the same technique as before to achieve full coverage with no visible streaks or unevenness. Cure this additional layer under a lamp for its specified time to set into effect.
E. Repeat the Process If Desired for Additional Layers If you prefer more intense colors or want to add depth and dimension to your manicure, repeating the application process may add additional layers. Be sure to apply each coat thinly and evenly, curing each time under a lamp after every coat - building gradually ensures good adhesion without risking premature lifting or peeling of layers.
F. Apply a Top Coat and Cure for Glossy Results To further protect and seal your gel manicure, add a thin layer of top coat. A glossy surface and added durability prevent chipping while prolonging its longevity; apply evenly across every nail surface including free edges before curing for the recommended time in a lamp for optimal results.
IV. Aftercare
A. Wipe Off the Sticky Residue with Lint-Free Wipe and Cleanser
After curing the top coat, you may notice tacky or sticky residue on your nails that is known as the "sticky layer" or inhibition layer. To quickly and effectively get rid of it and reveal its true glossy finish, use a lint-free wipe moistened with gel cleanser or rubbing alcohol, wiping over each nail gently to eliminate sticky layers and leave behind clean and beautiful surfaces
C. Moisturize Hands and Cuticles on a Regular Basis To ensure healthy nails and cuticles, make it part of your regular care routine to moisturize hands and cuticles regularly after receiving your gel manicure. Use cuticle oil or hand cream with moisturizing properties to hydrate the skin and massage into cuticles to promote nail growth without dryness.
D. Limit Harsh Chemicals and Excess Water Exposure Gel polish is known for its durability; however, to prolong its longevity it's essential that nails remain protected from harsh chemicals and excessive water exposure. Household cleaners such as bleach or strong detergents can weaken gel polish and lead to premature lifting or peeling. Prolonged bathing or swimming sessions may also decrease its longevity. To protect yourself against potentially harmful substances or activities when dealing with potentially hazardous substances or activities use protective gloves so your nails are safe from being damaged.
E. Wear Gloves When Doing Household Chores To safeguard your gel manicure against unnecessary wear and tear, it's wise to wear gloves while performing household tasks such as cleaning dishes or gardening that could potentially come into direct contact with water, chemicals or abrasive surfaces that could compromise its integrity. By donning gloves during these activities you can help preserve its lifespan while prolonging its longevity.
V. Removal
A: Gently Filing the Top Layer of Gel Polish
When it's time to take down a gel manicure, begin by gently filing its top layer. Use a gentle nail file to gently scrape away its shine and break open its seal, while being sure not to file too aggressively as this only needs to occur to allow acetone into its layers of polish.
B. Soak Cotton Pads in Acetone and Position Them on Each Nail Once the top layer has been filed away, soak small cotton pads in acetone and position them directly on each nail, so as to cover all surface area. You may secure these cotton pads by wrapping small pieces of aluminum foil around each finger - this should ensure complete coverage and coverage across each fingertip.
C. Use Aluminum Foil and Soak Nails for 10-15 MinutesAfter applying cotton pads saturated with acetone-soaked cotton buds on your nails, wrap each finger snugly in aluminum foil to form a seal that traps heat and expedites the effectiveness of the acetone in breaking down gel polish. Allow this method to soak for approximately 10-15 minutes to give acetone sufficient time to penetrate and soften its impact on gel nails.
D. Removing Foil Wraps and Pushing Off Softened Gel Polish After the soaking period is complete, carefully remove your foil wraps. Your gel polish should have noticeably softened and lifted away from your nail surface; use a cuticle pusher or orangewood stick to gently push off this softened gel polish with care to avoid damaging natural nails; any stubborn areas should repeat this step until complete removal can take place.
E. Buff and Moisturize Nails Following Removal Once all the gel polish has been successfully removed, buff the nails gently to smooth away any roughness or residue left by using a nail buffer or soft nail file, but take care not to overdo this step as this can thin out the nail plate. Afterward, apply cuticle oil or moisturizer as a form of nourishment to nourish and hydrate both nails and cuticles.
VI. Tips and Tricks
A. Apply Thin Layers for Better Adhesion and Curing To ensure proper adhesion and curing, applying thin coats of gel polish is key to ensure successful adhesion and curing. Thick layers take longer to cure, leading to uneven or lumpy finishes; applying thinner coats allows UV or LED lights to permeate each layer for an efficient cure process that ensures long-term durability.
B. To Prevent Lifting of Gel Polish One of the primary sources of gel polish lifting or peeling is when it makes contact with cuticles or surrounding skin, making direct contact between each layer applied and cuticles; to avoid this issue leave a small space between each application of gel polish and your cuticles - this serves as an extra buffer zone, decreasing chances of lifting while improving adhesion and adhesion.
C. Select an Appropriate UV/LED Lamp With Recommended Wattage Utilising the right UV or LED lamp is key to effectively curing gel polish, with different brands having specific recommendations regarding lamp wattage and curing times. Make sure your lamp meets these specifications so as to ensure effective curing and long-term manicure success!
D. Comply With Manufacturer Instructions Regarding Curing Time Each gel polish brand may vary slightly in its curing times, making it important to read and abide by each manufacturer's instructions regarding recommended curing duration for each layer of gel polish. Doing this ensures it hardens properly and extends its longevity.
Gel nail polish offers many benefits, from its long-term wear ability to chip resistance. By following the step-by-step guide provided in this article, you can achieve salon-quality results at home using gel polish. From nail preparation and application techniques to removal procedures and care regimens - taking extra steps will guarantee a beautiful long-term gel manicure to reflect your personal style! Go ahead and experiment with different colors, designs, and techniques - know that gel nail polish will provide both convenience and durability!


